How to Install Google’s Find My Device app on an IDVisor Smart, Smart V2, and Smart Plus
The following instructions provide a step by step tutorial on how to install Google Play Protect’s “Find My Device” feature on an IDVisor Smart device. This feature is especially useful to all clients with a Smart device in any environment. Whether the device has been misplaced or stolen, the Find My Device feature has tools to determine the device locations, lock the device, and even let you erase the contents on the device if stolen allowing you to protect customer information.
Note: Write down and save the google account address or password used on your ID Scanner, especially for the find my device feature. The device may be permanently locked if the google account or pin code is lost. If you hire an IT firm to set this up, make sure they share this information.
The following items below are required to set up “Find My Device” on an IDVisor Smart device:
- An IDVisor Smart device
- Wifi Connection – Learn How to Connect to Wifi on an IDVisor Smart Device here.
- A Google Account – Learn How to Create a Google Account on a IDVisor Smart Device here.
Note: We DO NOT recommend using a personal or business Google account on your IDVisor Smart device for security reasons. We recommend creating a Google Account specifically for your Smart device.
Follow the step by step instructions below in order to install Google’s Find My Device feature on a Smart device.

Step 1: We will begin by exiting the IDVisor Smart app. Select Exit to exit the application.

Step 2: After selecting Exit, you will be required to enter the pincode for your IDVisor Smart app. If the pincode was never changed it will be the default pincode (refer to your IDVisor Smart user manual for pincode).
Enter your pincode then select Submit.

Step 3: Once you’ve exited the app, you’ll be taken to the Android home screen.
Swipe Up from the arrow above the IDVisor Smart app icon on the home screen to access the list of apps.

Step 4: Look for the Settings app on the apps page.
Once found, tap on the Settings app to open.
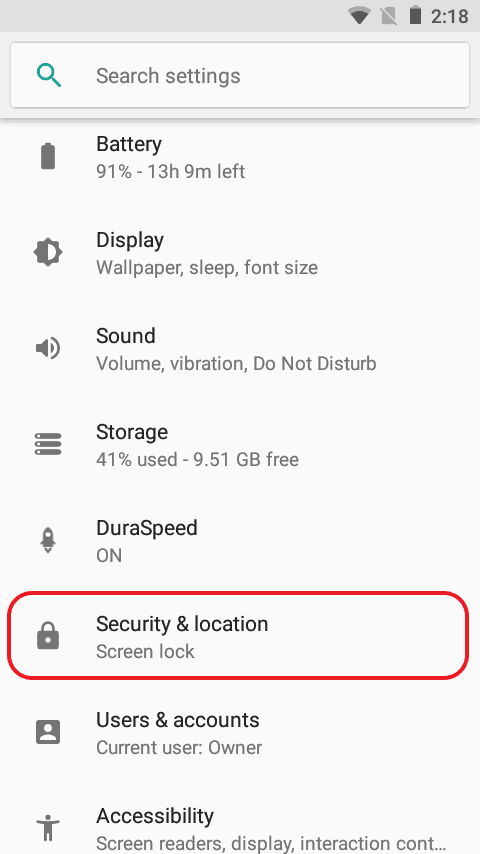
Step 5: Once in Settings, scroll down and look for Security & location.
Here is where we will turn on the Location function of the device.

Once in Security & location, look for Location.
We will now turn ON the Location feature on the device.
Tap on Location to begin.
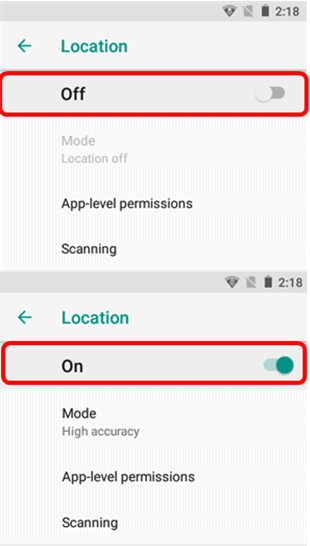
Look for the Location On/Off button.
Toggle the switch to the right of “Off” to turn on Location.
Once the switch has been switched on, you will see “On” under Location.
Tap the top left arrow to the left of Location once it has been turned on to return to the Security & location screen.
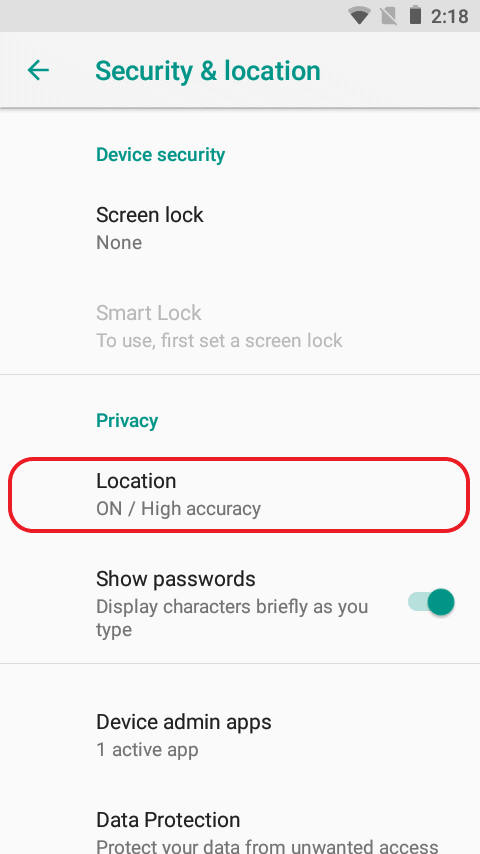
Back on the Security & location screen, look under Privacy.
It should now say ON/High accuracy under Location.
Tap the back arrow next to Security & location to return to the Settings menu.
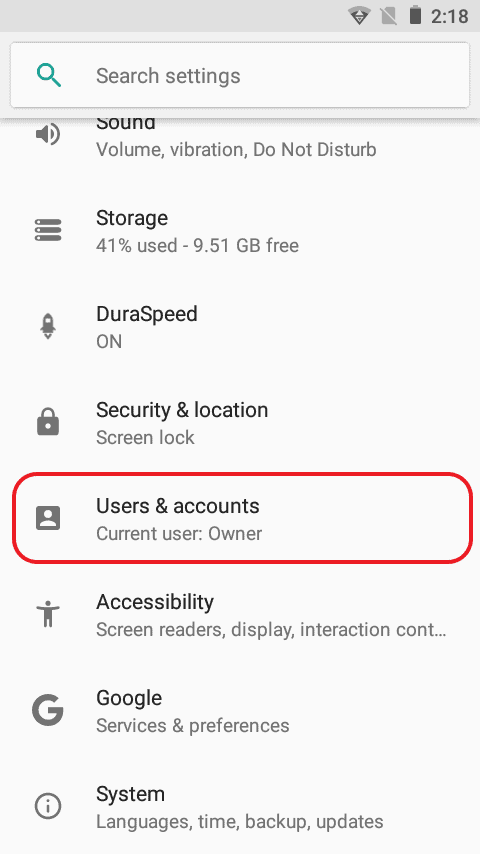
Step 6: Once returned to the Settings menu, we will now register a Google account on the device.
Note: We DO NOT recommend using a personal or business Google account on your IDVisor Smart device for security reasons. We recommend creating a Google Account specifically for your Smart device.
Learn How to Create a Google Account on a IDVisor Smart Device here.

Once in the Users & accounts settings, look for Account for Owner.
Under Accounts for Owner select Add account.
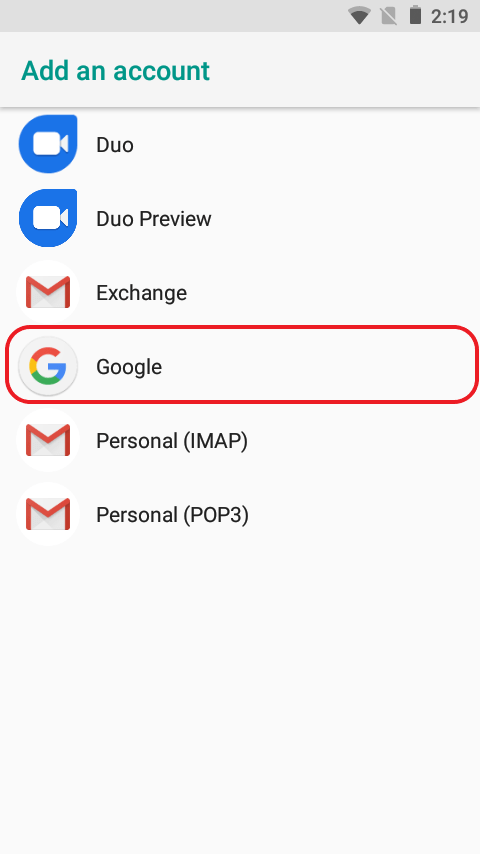
Once in the Add an account settings, select Google.
When Google is selected, you will be taken to the Google Sign in page. Remember we DO NOT recommend using a personal or business Google account since it contains private information. Learn How to Create a Google Account on a IDVisor Smart Device here.
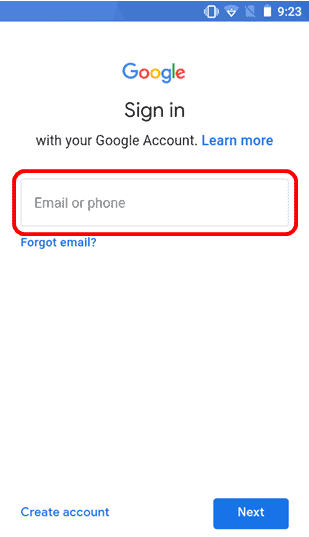
Enter the Email address of the Google account you would like to use.
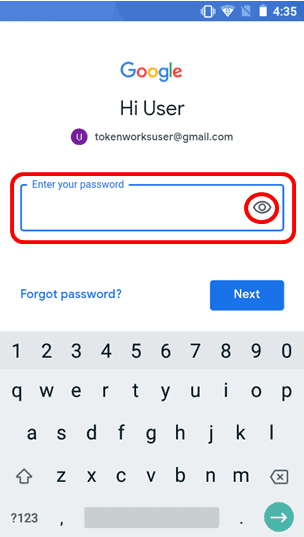
After entering the Email address of the Google account you would like to use, enter the password for the Google account chosen.
Tip: You can click the eye circled in red to see the password you are typing in, in order to check for errors.

After entering your Google account credentials, you will be taken to the Google Terms of Service page.
Review Google’s terms of service then select I agree.

After you’ve agreed to Google’s Terms of Service, Google will check the credentials provided for any errors.
This process can take up to 1-2 minutes.
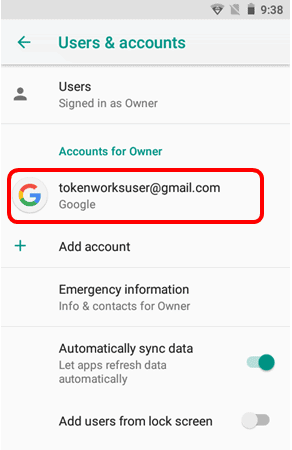
After your info has been checked and confirmed. You will now see your Account shown under Accounts for Owner.
After confirming you see your account, hit the back arrow next to Users & accounts, to return to the Settings.
Then click the back button on the physical keyboard to return to the page of apps.

Step 7: When you have returned to the page of apps, look for the Play Store app. Once found tap the Play Store icon to open the app.

Step 8: Once the Play Store app has been opened, look at the top of the screen for the search bar.
In the search bar type in Find My Device.

NOTE: In the next step when clicking Install to install the Find My Device app, you will be asked to Complete account setup. Select CONTINUE when this message appears.
You will be taken to the next page asking you to add a credit card, paypal, or redeem code.
Ignore these selections and select SKIP in the lower corner.

Once you search for Find My Device, the first option you see is the Google Find My Device app.
Click on INSTALL to begin installing the Google Find My Device app.
Once the app is finished installing click on OPEN to open the app.

Once you’ve opened the Google Find My Device app, you will then see the account you’ve created as a User that can be selected.
Select Continue as User to advance to the next screen.

When you have advanced to the next page, you will be asked to enter the password for the Google account.
After entering the password select Sign in.
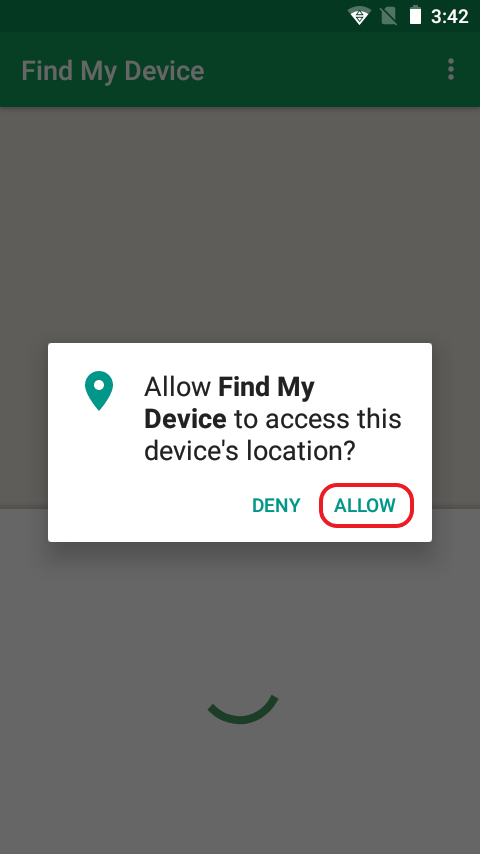
After successfully signing in to your account on the Find My Device app. You will then need to allow the app access to the device’s location.
Select ALLOW to allow access to the device’s location.

After allowing access to the device’s location, review the Terms of Service for the Find My Device app.
After reviewing the terms of service select ACCEPT.

Step 9: After accepting the Terms of Service you will be taken into the app.
In the app you can see where the device is currently located on Google maps.
Find My Device has 3 features you can use to find & protect your device if ever lost or stolen. To learn How to use Google’s Find My Device features click here. You can also learn by taking a look at Google Play Protect’s Find My Device Youtube video here.
- Play Sound.
- Secure Device.
- Erase Device (only accessible when using app on different device or web).
After viewing these features, press the physical back button on the keyboard to return to the page of apps.

On the page of apps installed on the device, confirm that the Find My Device app is one of the available apps on the page.
You have now successfully installed Google’s Find My Device app on your IDVisor Smart device.
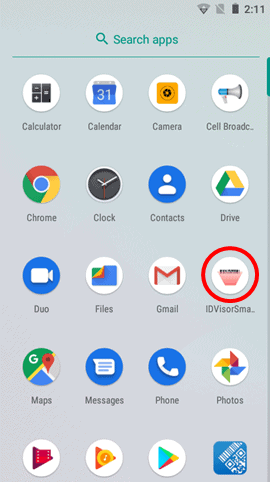
Step 10: Scroll down and look for the IDVisor Smart app. Tap on the IDVisor Smart app icon to return to the IDVisor Smart app.
You have now successfully installed Google’s Find My Device and returned to the IDVisor Smart app.
To learn How to use Google’s Find My Device features click here.