Connecting to WiFi on IDVisor Smart, Smart Plus, and Smart V2
Although the Smart devices do not have to be connected to Wifi in order to function. It is important to know how connect your Smart to Wifi in order to check for any software updates, wireless exports, and IDVisor Sync functions (Sync customers only).
Follow the instructions below to learn how to connect your IDVisor Smart, Smart Plus, and Smart V2 to Wifi.
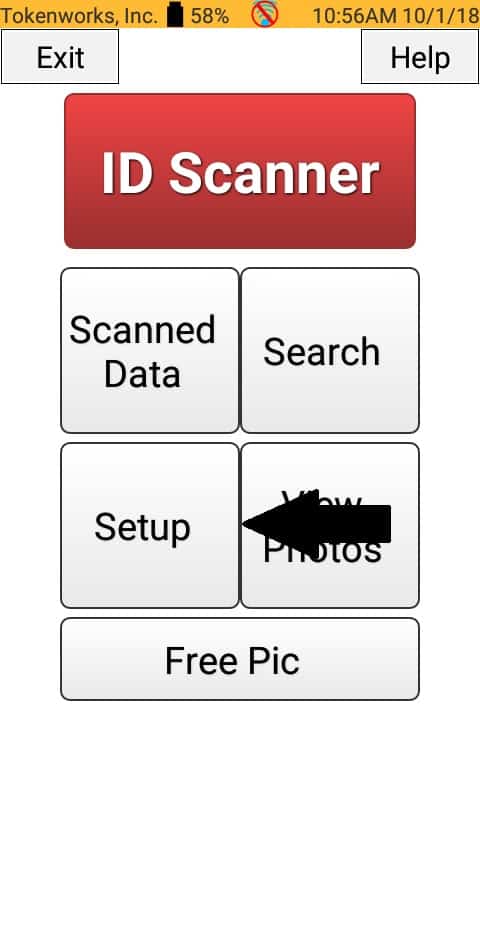
Step 1: From the Smart home screen select Setup.

Step 2: Once in the Setup menu, select Wifi.
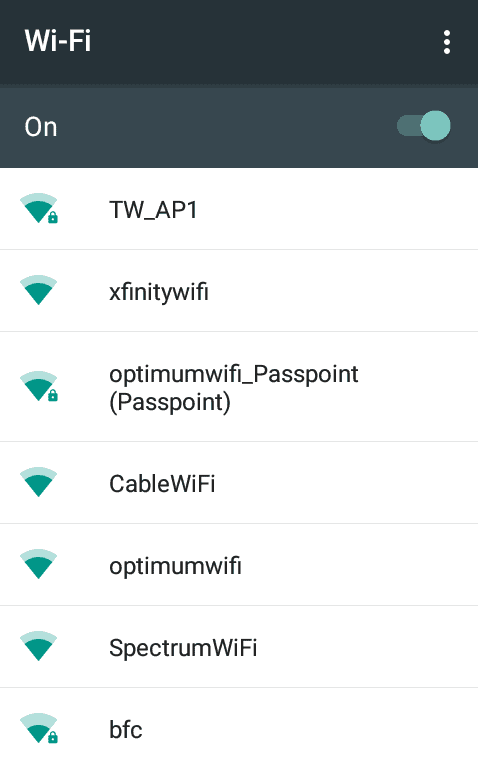
Step 3: After selecting Wifi, you will be taken to the list of available Wifi connections in your area.
Look for and select your Wifi network.

Step 4: Enter the Wifi password for the selected network.
Check the “Show Password” box to see the password you are entering to ensure it is correct.
Press Connect after confirming the correct password was entered.

Step 5: After successfully connecting, press the back button on the IDVisor Smart keyboard until you have returned the home screen.
Make sure the Wifi symbol shows a connection as in the picture to your left. You are now successfully connected to Wifi.