Description: If you’re receiving the wrong/incorrect age on every scan, please refer to the instructions below on how to set the date and time on your IDVisor Smart V1/V2/Plus/S50.
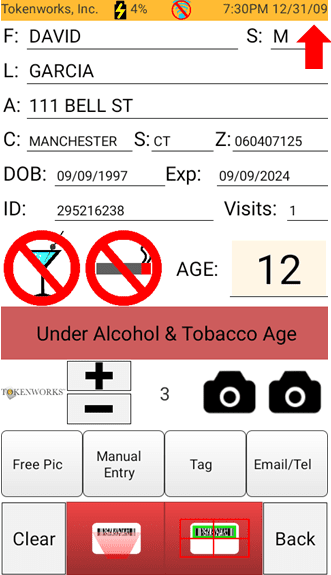
Incorrect Age shown.
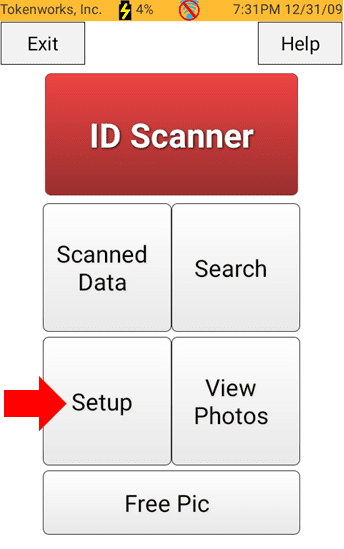
Step 1: Go back to the Main Screen then tap Setup.
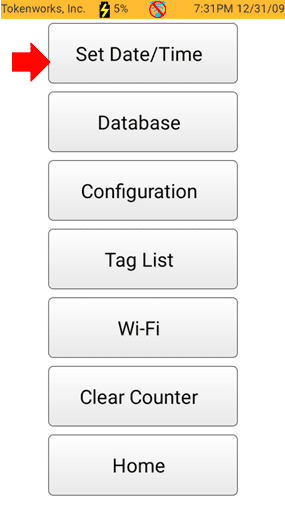
Step 2: Tap on Set Date/Time.
If Connected To Wifi:
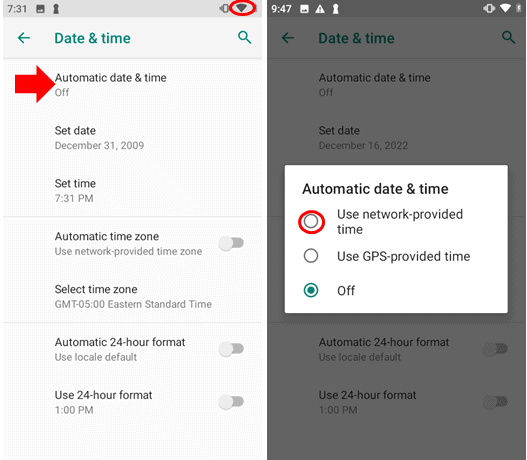
Step 3: If connected to Wifi, you can set the device to “Use network-provided time”. This option will use your Wifi network to always keep the correct time.
Note: See here on how to connect your IDVisor Smart Device to Wifi.
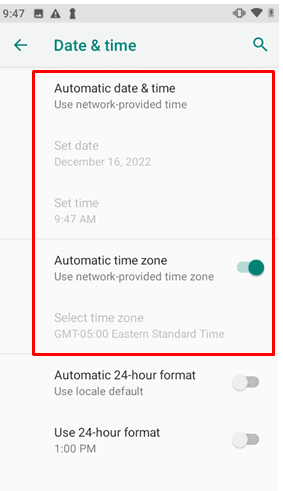
Turn on Automatic time zone to use the Wifi network to set the Time Zone.
If not using Wifi or preferred to stay disconnected from a network:
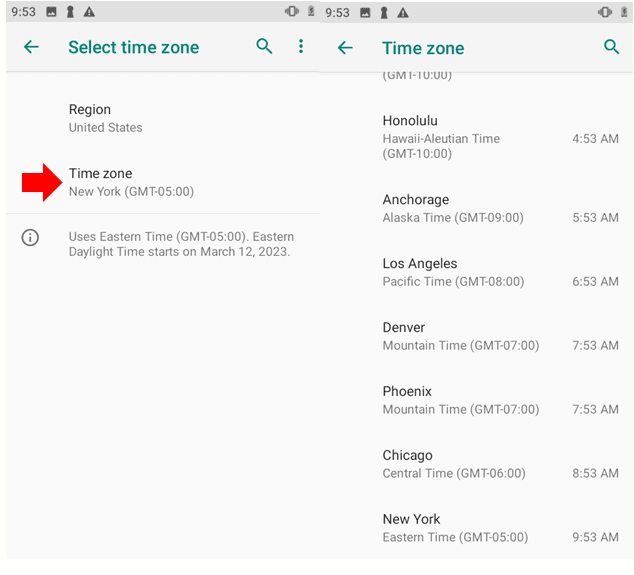
Tap on Select Time Zone then tap on Time Zone. Set the Time Zone for your location.
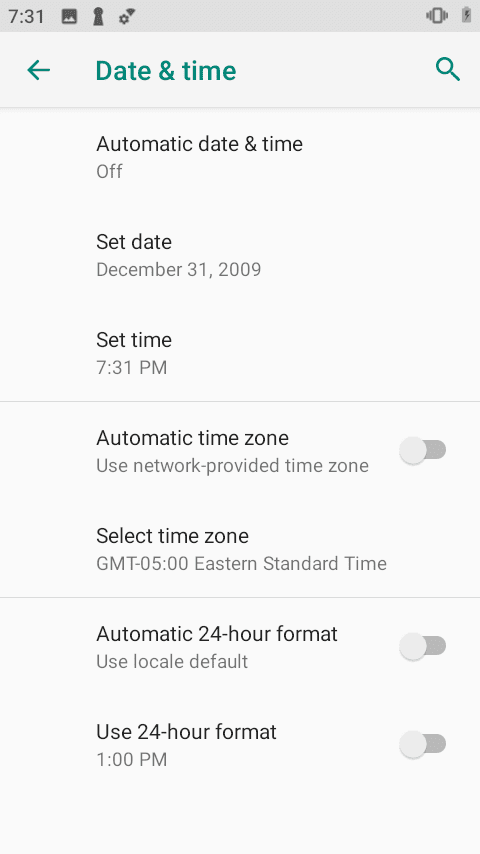
After setting the Time Zone, tap on Set Date to set the date.
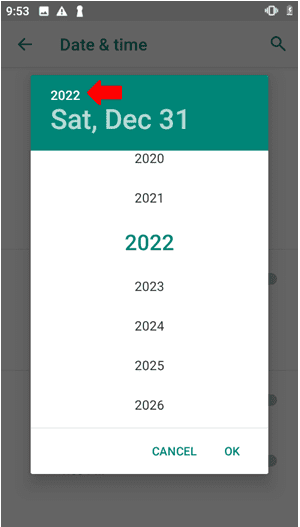
Tap on the year, and then scroll down to select the correct year.
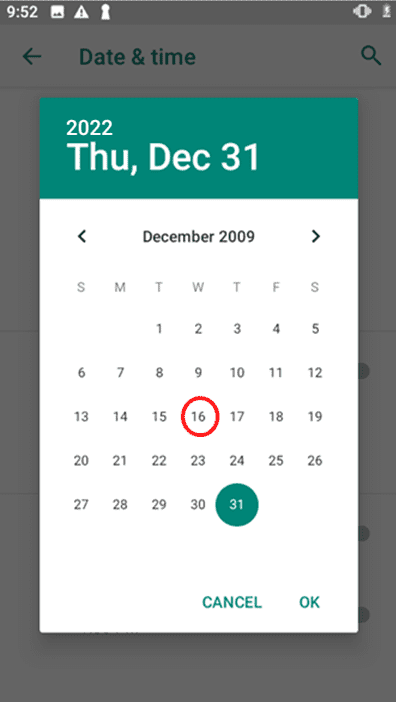
Tap on the correct date to change the date. Then tap OK.
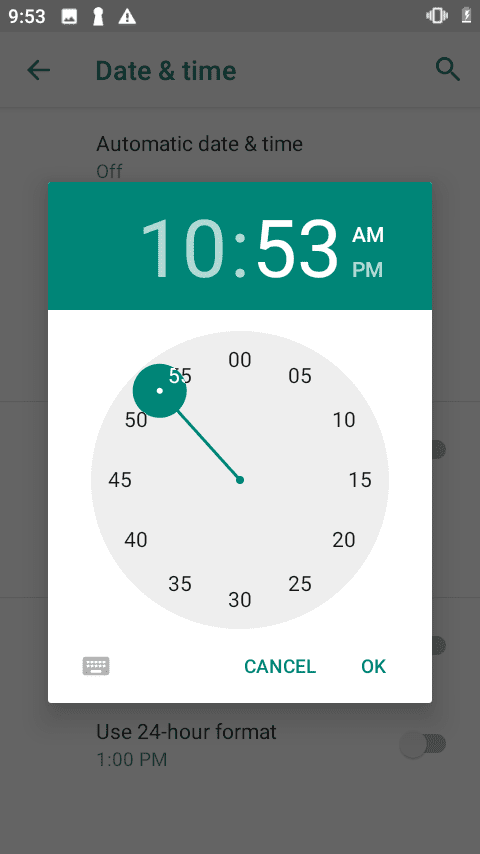
Once the date is set, set the correct Time.
Navigate back to the ID Scanner screen.
You will now see the correct date & time in the top right hand corner.
When an ID is scanner, it will now show the correct age.