If your IDVisor Smart, Smart Plus, or Smart V2 will not charge or you are experiencing charging issues with your device, please follow the troubleshooting steps below to correct the issue.
With Charging Block and USB Cable
If having issues charging with the USB cable provided with your Smart or Smart Plus:
1. Ensure you are using the correct charging block. See the pictures below to see which charging block you should be using for you Smart device.

IDVisor Smart Charging Block
Specifications:
AC/DC Adapter
Input: 100 240 VAC 50/60 Hz 0.2 A Max
Output: DC 5V/2A

IDVisor Smart Plus/V2 Charging Block
Specifications:
Input: 100-240V 50/60 Hz, 0.2 A
Output: 5V/2A

Older versions Of IDVisor Smart
Specifications:
Input: 100-240V 50/60 Hz, 0.2 A
Output: 5V/1A
2. Check the pictures below to determine what type of cable your Smart device.

IDVisor Smart/Older versions of IDVisor Smart Plus
Type of cable: Micro USB cable
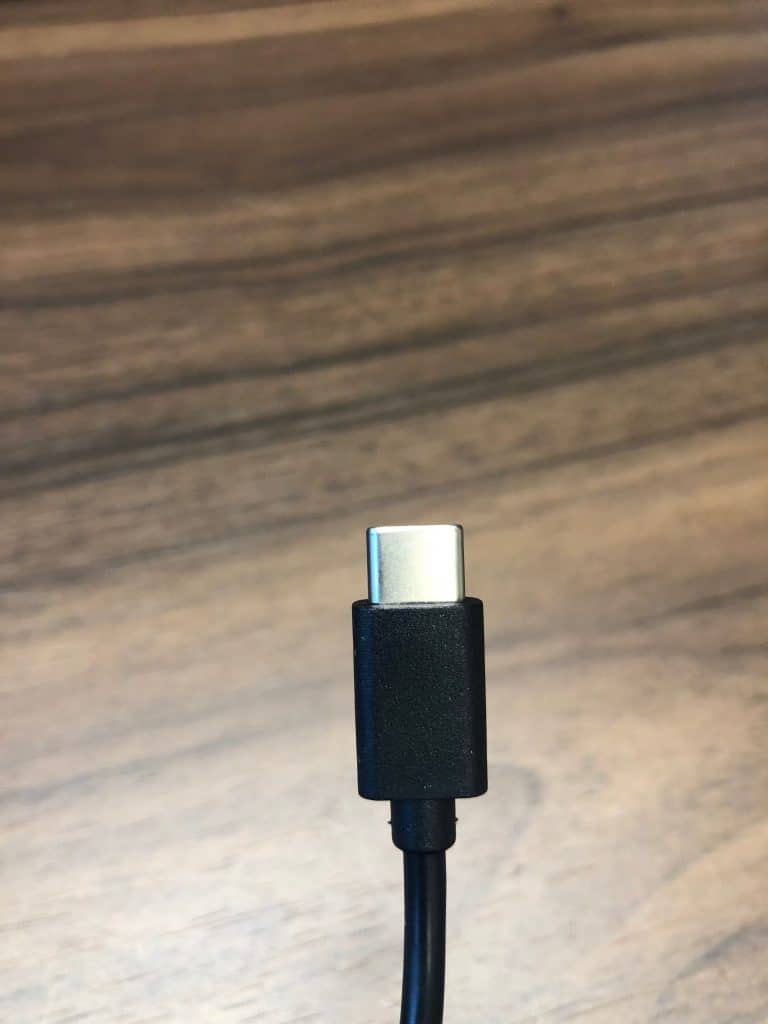
IDVisor Smart V2/New versions of IDVisor Smart Plus
Type of cable: USB Type C
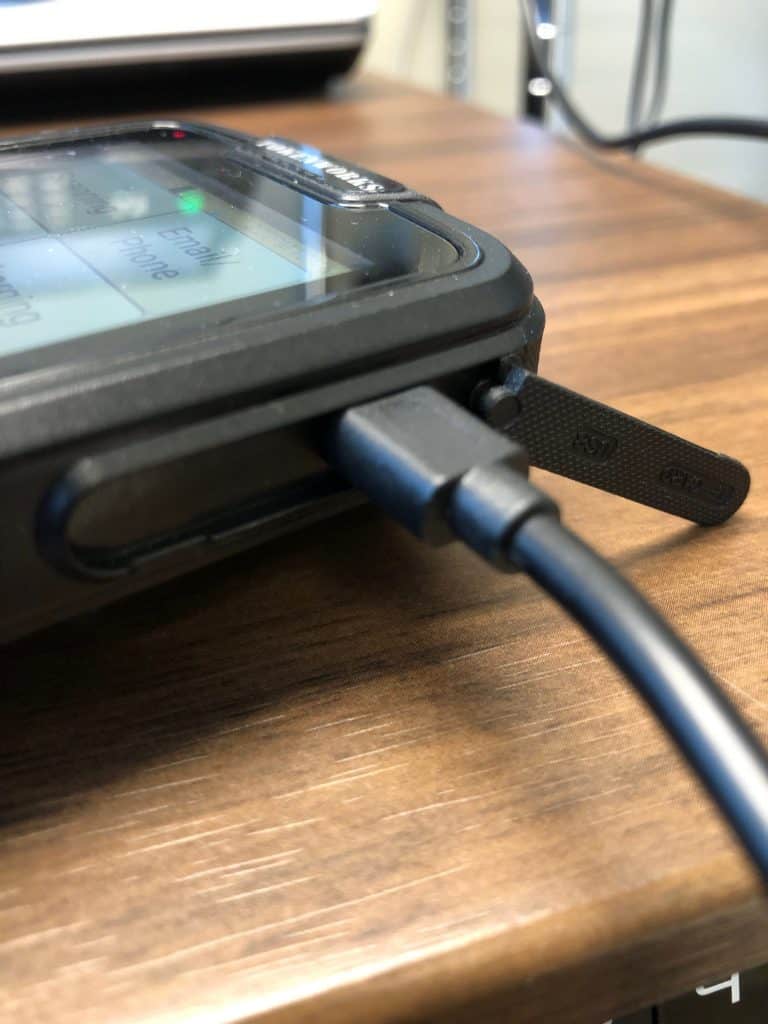
Ensure the cable is fully inserted into the charging port at the side of the Smart device. See the pictures below to see how the cable should be inserted into each Smart device.
IDVisor Smart

IDVisor Smart Plus

IDVisor Smart V2
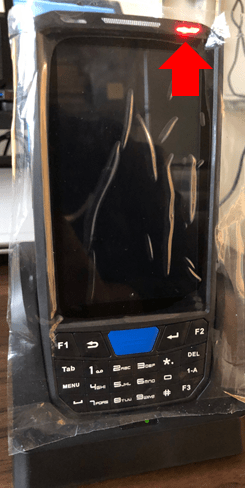
3. Ensure the power light turns to a solid red when the cable is plugged into the Smart device. See the pictures to view how the power light should look when successfully charging with the USB cable.

IDVisor Smart

IDVisor Smart Plus

IDVisor Smart V2
4. Check your Smart device for a loose connection port.

While the cable is inserted into the device, slightly move the cable in an up down motion and in a side to side motion. Please take note of the power light on the device. If the light blinks on and off while moving the cable, it is an indication of a loose connection port.
IDVisor Smart used for example in picture.
Note: If it is determined that the device has a loose connection port, the device will have to come in for repair (charges may apply). Please scroll to bottom of the post for instructions on contacting support.
With Charging Cradle
If having issues charging with the charging cradle provided with your IDVisor Smart, Smart Plus, or Smart V2 try the troubleshooting steps below:
1. Ensure the correct power adapter being used is:

IDVisor Smart
Specifications:
Input: 100 240V 50/60Hz
Output: 5V/2.5A

IDVisor Smart Plus & IDVisor Smart V2
Specifications:
Input: 100 240V 50/60Hz
Output: 5V/3A

The IDVisor Smart, Smart Plus, and Smart V2 have the same size power jack.
2. See each picture below to determine which charging cradle your Smart device uses.


Ensure the power adapter is fully inserted into the charging cradle.

IDVisor Smart

IDVisor Smart Plus

IDVisor Smart V2
3. Ensure the power light turns to a solid red when the device is standing in the cradle. Please ensure the hand strap or any items are not preventing the device from making contact with the charging pins when standing in the cradle. See the pictures below to see how the charging light should be when charging in the cradle.

IDVisor Smart
Red LED in top left corner.

IDVisor Smart Plus
Red LED in top right corner.
IDVisor Smart V2
Red LED in top right corner.
Note: If device does not show it is receiving a charge when standing in the cradle, please see above steps for charging with the USB Cable. If the device charges with the USB cable and not the cradle, there may be an issue with the cradle or unit. Scroll down to the bottom of the page to open a support ticket for further assistance if experiencing this issue.
4. If after following the steps above the device still does not take a charge, we will not charge the battery directly in the charging cradle. Please follow the directions for each Smart device to carefully remove the battery.
IDVisor Smart
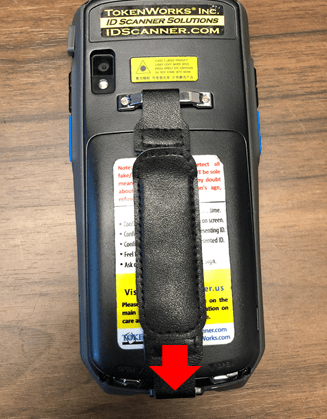
Step 1: Turn unit around to see the back of the device.

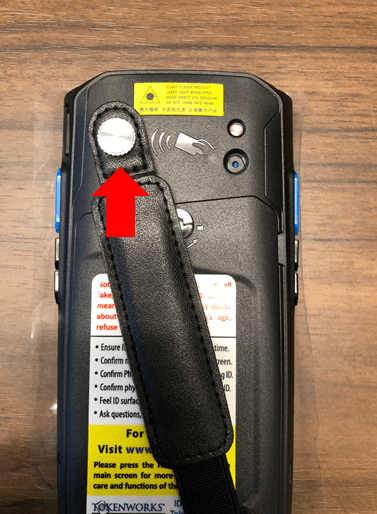
Step 2: Un-clip the hand strap on the back of the unit.
Turn the back plate locks to unlock and remove the back plate.
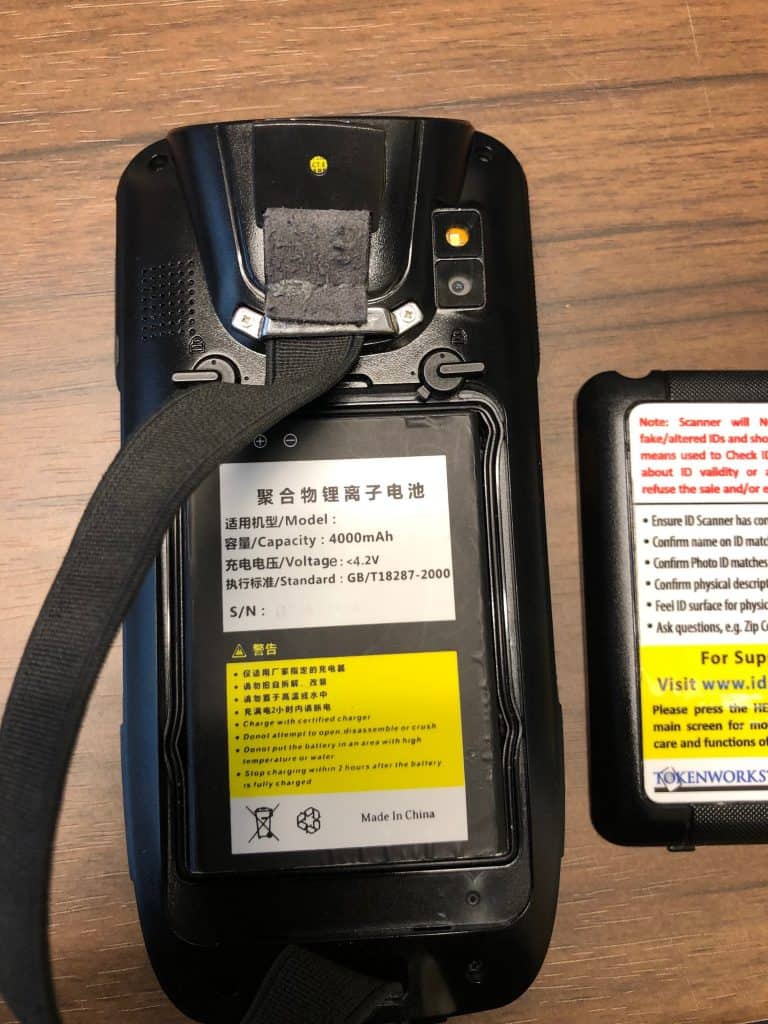
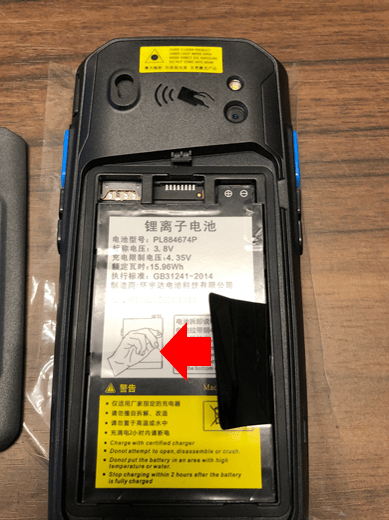
Step 3: Lift the back plate off. You should now see the battery for the IDVisor Smart.
To remove battery, gently push up from the bottom of the battery and lift out of the slot.

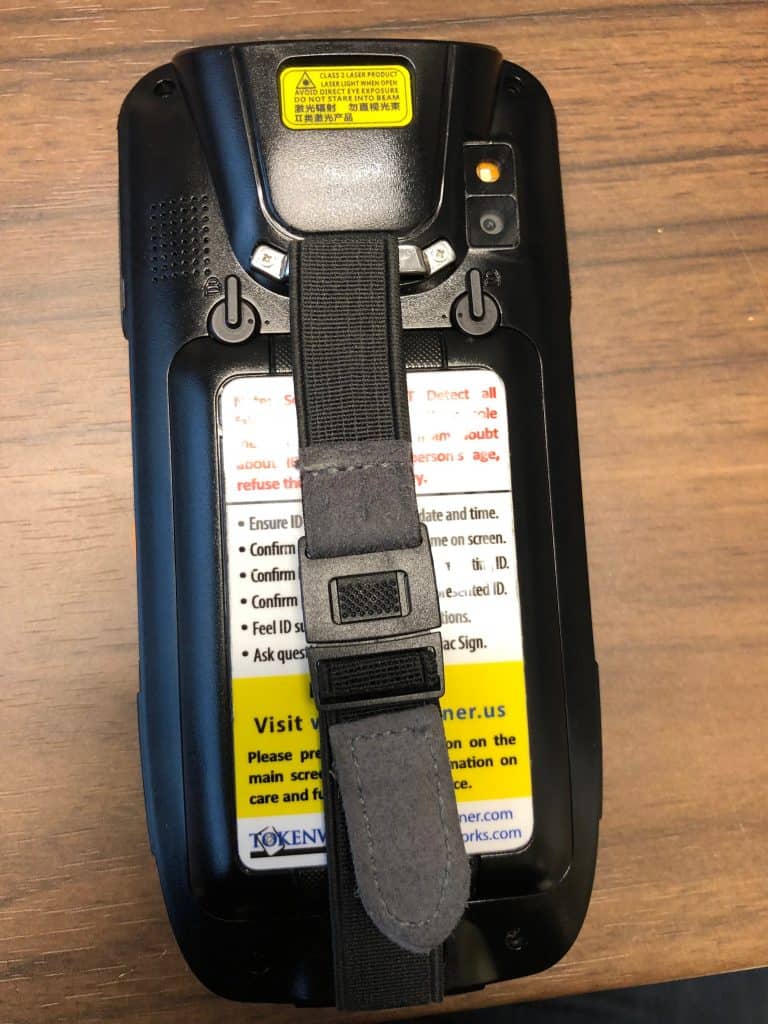
Step 4: Take note of the gold contact pins on the IDVisor Smart (see red arrow). Make sure they are not pushed down or damaged.
If they are pushed in or damaged, the device will have to come in for repair and charges may apply. Please scroll to bottom of the post for instructions on contacting support.
IDVisor Smart Plus
Step 1: Turn unit around to see the back of the device.
Pull down the hand strap clip to un-clip hand strap.

Step 2: Turn the back plate locks to unlock and remove the back plate.

Step 3: Look for the indentation of the back plate. Lift up to take off the back plate.

Step 4: Once the back plate is off. Pull down the pull tab on the battery to lift the battery off.

Step 5: Take note of the gold contact pins on the IDVisor Smart Plus (see red arrow). Make sure they are not pushed down or damaged.
If they are pushed in or damaged, the device will have to come in for repair and charges may apply. Please scroll to bottom of the post for instructions on contacting support.
IDVisor Smart V2
Step 1: Turn unit around to see the back of the device.
Push up the hand strap clip to un-clip hand strap.

Step 2: Turn the battery lock to unlock the back plate.

Step 3: Look for the indentation of the back plate. Lift up to take off the back plate.
Step 4: Pull the battery pull tab to your left, then lift the battery out of place.
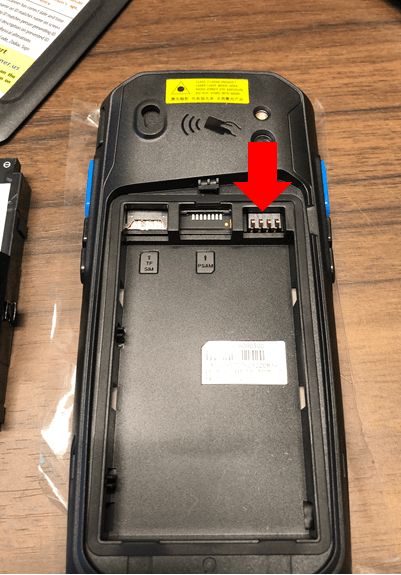
Step 5: Take note of the gold contact pins on the IDVisor Smart V2 (see red arrow). Make sure they are not pushed down or damaged.
If they are pushed in or damaged, the device will have to come in for repair and charges may apply. Please scroll to bottom of the post for instructions on contacting support.
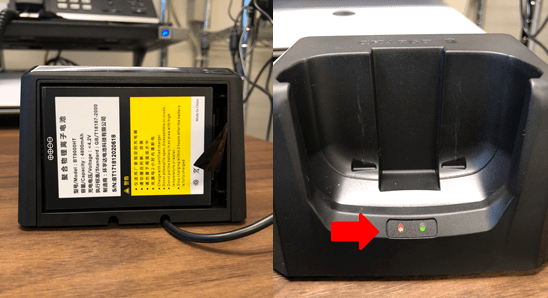
5. Insert the battery for your Smart device into the charging slot of it’s respective cradle. Once inserted one of the lights on the charging cradle should change to a solid red (see red arrow). Charge battery for 20-30 minutes then re-insert battery and try to power on. See pictures below for reference of how light and battery should look in unit.

IDVisor Smart battery charging cradle.
IDVisor Smart Plus battery charging cradle.

IDVisor Smart V2 battery charging in cradle.
Note: If cradle shows no light when the battery is inserted the cradle will either have to be repaired or replaced. Please scroll to bottom of the post for instructions on contacting support.
If after following the troubleshooting steps the device will still not receive a charge. Please submit a ticket leaving your Name, Name of Business, and Phone number here. Customer support will contact you with further details as soon as possible.