Description: If you have list of customers that you would like to ban, make VIP, etc. You can upload a tag list on to your AgeVisor Touch/AgeVisor POS. You can also upload existing tag lists from previous generation scanners if you have upgraded to a AgeVisor Touch/AgeVisor POS.
Items/Software needed:
- USB flash drive
- A Spreadsheet program i.e Microsoft Excel, Google Sheets, etc.
Instructions: Follow the directions provided to upload a tag list to your AgeVisor Touch/AgeVisor POS.
We will be using Microsoft Excel in our example below.

1. Create the Tag List in the Spreadsheet program.
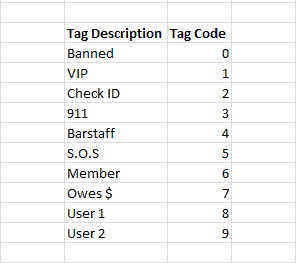
The column format should be as followed: Last Name, First Name, ID Number, Tag Code (for default Tag Code List see here), and Date of Birth (MMDDYYYY).
The tag list should NOT include column headers. All fields are not necessary except Last Name, First Name, and Tag Code. Please be aware the more fields filled in will provide more accurate results.
Name the tag list Banned_VIP.csv and save in a csv format. For help on saving a file in csv format see here.

2. After creating your tag list you will need to save it as a csv file (see steps on how to save an excel file in a different format here). After saving as a csv file you will now need to put the file on the device.
From the Main screen navigate to Data.

3. On the Data screen you will now select View Imported Tag List. This will bring up a window where you can import the tagged customers.

4. Once you are in the View Imported Tag List window, select Import. This will begin the importing process. Be sure to have the USB flash drive with the Banned_VIP.csv file plugged in to the side of the unit before selecting import.

When the import process is complete and the records were successfully added you should receive a confirmation as shown in the screenshot above.
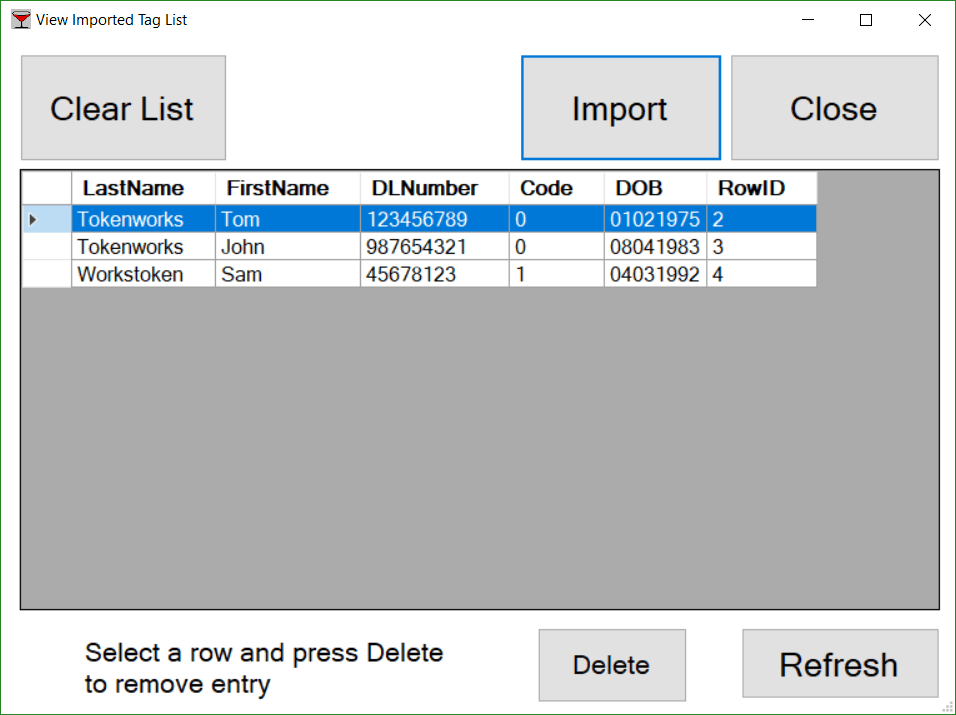
5. After the Import is complete you will see the names of the tagged customers that were imported. Once the names are shown the tagged customers have been added to your database. You can now close the current window and return to the Main screen.

When a name that was added to the tag list is scanned, you will receive a Potential Match pop up on the screen. After confirming the correct person is to be tagged, highlight the Customer and select Tag. The customer will now be fully imported into the database and searchable on the device.