Description: When the IDentiFake database begins to fill up on storage the IDentiFake software may begin to run slower. You may receive messages prompting you to delete data or messages saying “You have less than 1GB of data available. To prevent you from running out of storage space on the computer we will automatically delete the oldest images from your computer”. The following directions below explain how to delete data off of the IDentiFake and also setting up Auto Deletion on your IDentiFake.
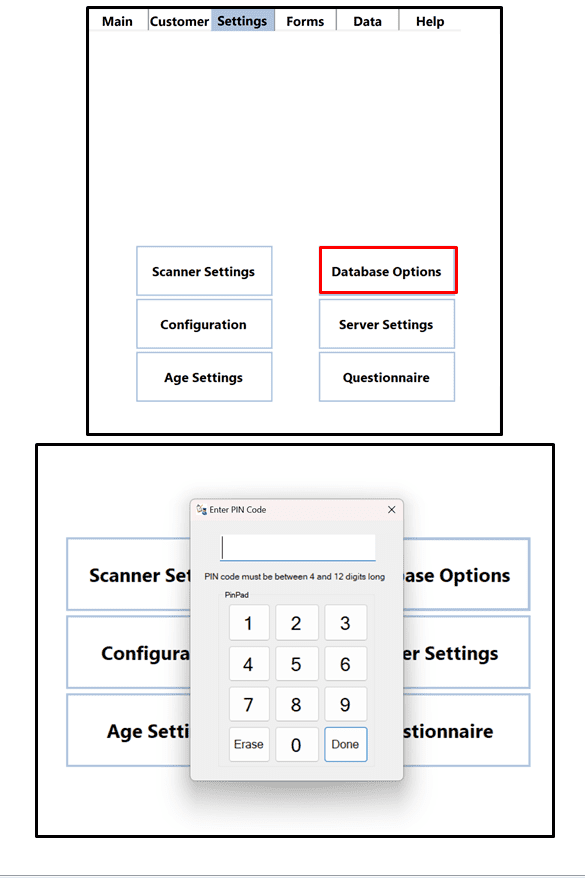
- First click on the settings tab at top of the screen and then click on Database Options. Enter your pin code (refer to User Manual for default pin code).
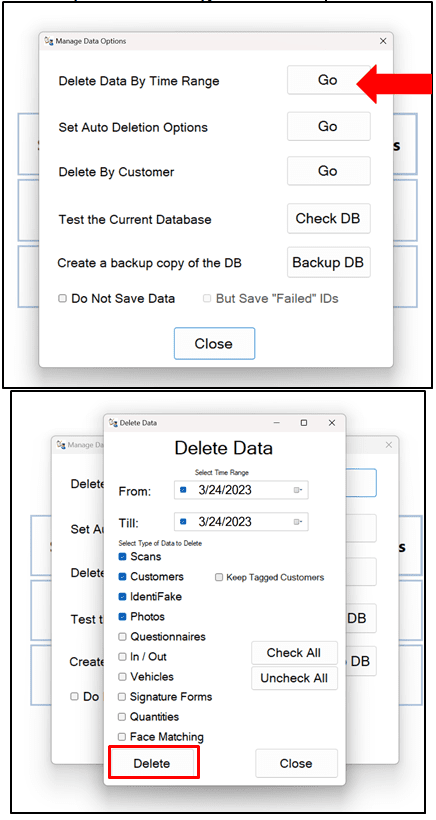
2. Click on “Delete Data By Time Range” and pick the range of when you would like to delete data and you can select which type of data to delete.
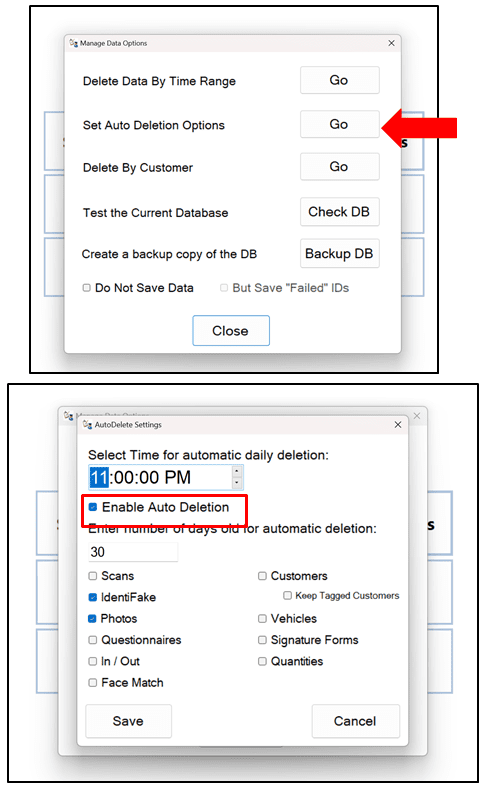
To enable automatic deletion of data. Click on “Set Auto Deletion Options”. Click on the “Enable Auto Deletion” box and then select the time for automatic deletion and the data that you wanted deleted.
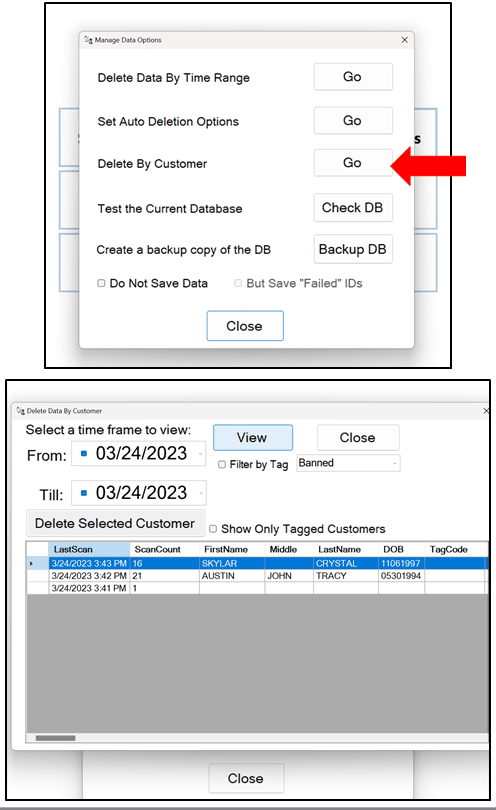
To delete specific customers from your database click on the “Delete By Customer” button. Select which customer’s data you would like to delete and click on the button “Delete Selected Customer”