Post Description: This post provides instructions on how to create a Manual Entry on an IDVisor Smart or IDVisor Smart Plus.
Step 1

Open the ID Scanner option in the IDVisor Smart app and select Manual Entry (highlighted in red).
Step 2
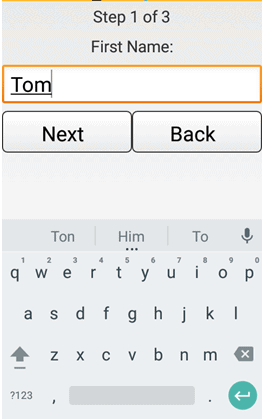
Enter the First name of the customer.
Step 3

Enter the Last name of the customer.
Step 4

Enter the Date of birth of the customer. The date of birth must be entered correctly to have an exact match the next time the customer is scanned.
Step 5
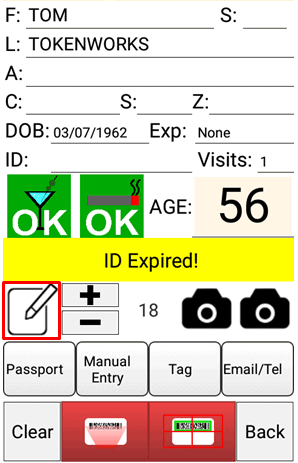
Select the Edit Icon (highlighted in red) in order to add more customer information.
Step 6

In the Edit option you can add more customer information as shown in the screenshot. Scroll down on the page to add City and Zip. After adding more customer information click save. The more information provided the more accurate the scan will be in the future. This is especially important for customers that will be tagged.
Completed Manual Entry
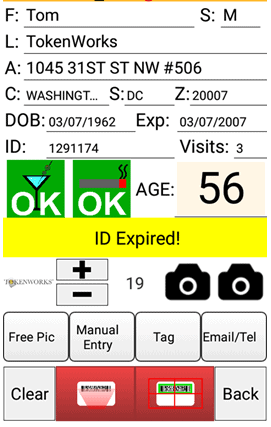
This screenshot shows the completed Manual Entry. You may now take a picture of the ID for future reference or Tag the customer.